Продолжаем тему предыдущей статьи и пробуем приблизиться к проблемам реальных проектов. В них ведь часто используются готовые наборы UI-элементов. Посмотрим как запустить компонентный тест, но с поддержкой Vuetify. Ранее мы пробовали подобное с Cypress. Сделаем похожим способом пример и создадим тесты на Playwright.
Содержание
- Что нужно сделать
- Новое приложение и Playwright CT
- Подключаем Vietify к Playwright CT
- Создаем компонент и тест
- Запуск тестов
- Тесты более сложного компонента
- Итоги
Что нужно сделать
- Создать проект на базе Vuetify
- Установить Playwright Component Testing ( Playwright CT )
- Корректно подключить Vuetify
Немного подробнее по последнему пункту. В приложении у нас, обычно, есть main.ts, в котором мы создаем объект vuetify через createVuetify и подключаем через app.use(vuetify).
Для компонентных тестов для этого служит playwright/index.ts, подключаемый в playwright/index.html. В нем надо вызвать createVuetify, передать ему необходимые для теста настройки и затем вызвать app.use(vuetify).
Передаваемые настройки при этом, с одной стороны лучше делать более близкими к используемым в приложении, с другой стороны не стоит нагружать вещами, не влияющими на суть тестов.
Новое приложение и Playwright CT
И так создадим проект:
npm create vuetify@latest

Need to install the following packages:
create-vuetify@2.7.0
Ok to proceed? (y)


> npx
> create-vuetify


Vuetify.js - Material Component Framework for Vue

✔ Project name: … vuetify-playwright-ct
✔ Which preset would you like to install? › Barebones (Only Vue & Vuetify)
✔ Use TypeScript? … No / Yes
✔ Would you like to install dependencies with yarn, npm, pnpm, or bun? › npm
✔ Install Dependencies? … No / Yes

◌ Generating scaffold...
◌ Installing dependencies with npm...

vuetify-playwright-ct has been generated at /home/igor/projects/myblog/examples/p9298/vuetify-playwright-ct

Discord community: https://community.vuetifyjs.com
Github: https://github.com/vuetifyjs/vuetify
Support Vuetify: https://github.com/sponsors/johnleider
Сразу установим Playwright Component Testing
npm init playwright@latest -- --ct Подключаем Vietify к Playwright CT
Как Vuetify подключен в приложении
Так в main.ts у нас сгенерирован такой код:
// Plugins
import { registerPlugins } from '@/plugins'

// Components
import App from './App.vue'

// Composables
import { createApp } from 'vue'

// Styles
import 'unfonts.css'

const app = createApp(App)

registerPlugins(app)

app.mount('#app')
В src/plugins/index.ts подключен наш vuetify.
// Plugins
import vuetify from './vuetify'

// Types
import type { App } from 'vue'

export function registerPlugins (app: App) {
  app.use(vuetify)
}
Который настраивается так:
import '@mdi/font/css/materialdesignicons.css'
import 'vuetify/styles'

// Composables
import { createVuetify } from 'vuetify'

// https://vuetifyjs.com/en/introduction/why-vuetify/#feature-guides
export default createVuetify({
  theme: {
    defaultTheme: 'system',
  },
})
Подключаем Vuetify к компонентным тестам
Так будет выглядеть наш index.ts для Playwright.
// Import styles, initialize component theme here.
import '@mdi/font/css/materialdesignicons.css'
import 'vuetify/styles'

// Playwright CT hooks
import { beforeMount } from '@playwright/experimental-ct-vue/hooks'

// Import Vuetify
import { createVuetify } from 'vuetify'
import * as components from 'vuetify/components'
import * as directives from 'vuetify/directives'

// Create Vuetify instance
const vuetify = createVuetify({
  components,
  directives,
  theme: {
    defaultTheme: 'light',
  },
})

// Configure Vue app for each component test
beforeMount(async ({ app }) => {
  app.use(vuetify)
})

// Export Vuetify instance for direct use in tests if needed
export { vuetify }
Чтобы подключить Vuetify нам пришлось передать components и directives. Они нужны, чтобы Vuetify-компоненты (v-btn, v-card и так далее) и директивы работали в окружении компонентных тестов без “магии” сборки.
В обычном приложении, как правило, работает связка vite-plugin-vuetify и unplugin-vue-components. Она автоматически подтягивает нужные Vuetify-компоненты/директивы и делает “tree-shaking” (в сборку попадает только используемое). Поэтому там достаточно createVuetify({ theme: … }).
В компонентных тестах Vite-конфиг другой (см. ctViteConfig ниже в playwright-ct.config.ts), и эти плагины, обычно, не подключены
Ниже приведен сгенерированный playwright-ct.config.ts с указанием ctTemplateDir и ctViteConfig:
import { defineConfig, devices } from '@playwright/experimental-ct-vue';
import { fileURLToPath, URL } from 'node:url';

/**
 * See https://playwright.dev/docs/test-configuration.
 */
export default defineConfig({
  testDir: './',
  testMatch: /.*\.test\.(ts|tsx)/,
  /* The base directory, relative to the config file, for snapshot files created with toMatchSnapshot and toHaveScreenshot. */
  snapshotDir: './__snapshots__',
  /* Maximum time one test can run for. */
  timeout: 10 * 1000,
  /* Run tests in files in parallel */
  fullyParallel: true,
  /* Fail the build on CI if you accidentally left test.only in the source code. */
  forbidOnly: !!process.env.CI,
  /* Retry on CI only */
  retries: process.env.CI ? 2 : 0,
  /* Opt out of parallel tests on CI. */
  workers: process.env.CI ? 1 : undefined,
  /* Reporter to use. See https://playwright.dev/docs/test-reporters */
  reporter: 'html',
  /* Shared settings for all the projects below. See https://playwright.dev/docs/api/class-testoptions. */
  use: {
    /* Collect trace when retrying the failed test. See https://playwright.dev/docs/trace-viewer */
    trace: 'on-first-retry',

    /* Port to use for Playwright component endpoint. */
    ctPort: 3100,

    /* Path to the component test setup file */
    ctTemplateDir: './playwright',

    /* Vite config for component tests */
    ctViteConfig: {
      resolve: {
        alias: {
          '@': fileURLToPath(new URL('./src', import.meta.url)),
        },
      },
    },
  },

  /* Configure projects for major browsers */
  projects: [
    {
      name: 'chromium',
      use: { ...devices['Desktop Chrome'] },
    },
    {
      name: 'firefox',
      use: { ...devices['Desktop Firefox'] },
    },
    {
      name: 'webkit',
      use: { ...devices['Desktop Safari'] },
    },
  ],
});
Создаем компонент и тест
Также нам нужен компонент для тестирования и сам тест.
Компонент создадим в src/components/CounterButton.vue:
<template>
  <v-card class="pa-4" max-width="400">
    <v-card-title class="text-h6 mb-4">
      Счетчик кликов
    </v-card-title>

    <v-card-text>
      <div class="text-h4 text-center mb-4">
        {{ count }}
      </div>

      <v-btn
        color="primary"
        size="large"
        block
        @click="increment"
        data-testid="increment-button"
      >
        Увеличить
      </v-btn>

      <v-btn
        color="error"
        size="large"
        block
        class="mt-2"
        @click="reset"
        data-testid="reset-button"
        :disabled="count === 0"
      >
        Сбросить
      </v-btn>
    </v-card-text>
  </v-card>
</template>

<script setup lang="ts">
import { ref } from 'vue'

const count = ref(0)

const increment = () => {
  count.value++
}

const reset = () => {
  count.value = 0
}

// Expose for testing
defineExpose({
  count,
  increment,
  reset,
})
</script>
Код теста разместим рядом с компонентом — src/components/CounterButton.test.ts, чтобы проще было его искать.
import { test, expect } from '@playwright/experimental-ct-vue'
import CounterButton from './CounterButton.vue'

test('отображает начальное значение счетчика', async ({ mount }) => {
  const component = await mount(CounterButton)

  // Проверяем, что счетчик начинается с 0
  await expect(component.getByText('0')).toBeVisible()
})

test('увеличивает счетчик при нажатии на кнопку', async ({ mount }) => {
  const component = await mount(CounterButton)

  // Нажимаем на кнопку увеличения
  await component.getByTestId('increment-button').click()

  // Проверяем, что счетчик увеличился до 1
  await expect(component.getByText('1')).toBeVisible()

  // Нажимаем еще раз
  await component.getByTestId('increment-button').click()

  // Проверяем, что счетчик увеличился до 2
  await expect(component.getByText('2')).toBeVisible()
})

test('сбрасывает счетчик при нажатии на кнопку сброса', async ({ mount }) => {
  const component = await mount(CounterButton)

  // Увеличиваем счетчик несколько раз
  await component.getByTestId('increment-button').click()
  await component.getByTestId('increment-button').click()
  await component.getByTestId('increment-button').click()

  // Проверяем, что счетчик равен 3
  await expect(component.getByText('3')).toBeVisible()

  // Нажимаем на кнопку сброса
  await component.getByTestId('reset-button').click()

  // Проверяем, что счетчик сброшен до 0
  await expect(component.getByText('0')).toBeVisible()
})

test('кнопка сброса отключена когда счетчик равен 0', async ({ mount }) => {
  const component = await mount(CounterButton)

  // Проверяем, что кнопка сброса отключена при начальном значении
  // В реальном DOM это обычная кнопка: атрибут `disabled` присутствует и обычно равен пустой строке.
  const resetButton = component.getByTestId('reset-button')
  await expect(resetButton).toBeDisabled()

  // Увеличиваем счетчик
  await component.getByTestId('increment-button').click()

  // Проверяем, что кнопка сброса теперь включена (disabled="false" или отсутствует)
  // Vuetify может установить disabled="false" или удалить атрибут
  const disabledAttr = await resetButton.getAttribute('disabled')
  expect(disabledAttr).not.toBe('true')

  // Сбрасываем счетчик
  await resetButton.click()

  // Проверяем, что кнопка сброса снова отключена
  await expect(resetButton).toBeDisabled()
})

test('отображает правильный заголовок', async ({ mount }) => {
  const component = await mount(CounterButton)

  // Проверяем наличие заголовка
  await expect(component.getByText('Счетчик кликов')).toBeVisible()
})
Playwight знает где искать тесты благодаря двум параметрам в playwright-ct.config.ts:
  testDir: './',
  testMatch: /.*\.test\.(ts|tsx)/,
Запуск тестов
Теперь мы можем запустить тесты:
npm run test-ct

> vuetify-playwright-ct@0.0.0 test-ct
> playwright test -c playwright-ct.config.ts


Running 15 tests using 4 workers

vite v6.4.1 building for production...
✓ 70 modules transformed.
.cache/index.html                                             0.40 kB │ gzip:   0.27 kB
.cache/assets/materialdesignicons-webfont-Dp5v-WZN.woff2    403.22 kB
.cache/assets/materialdesignicons-webfont-PXm3-2wK.woff     587.98 kB
.cache/assets/materialdesignicons-webfont-B7mPwVP_.ttf    1,307.66 kB
.cache/assets/materialdesignicons-webfont-CSr8KVlo.eot    1,307.88 kB
.cache/assets/index-nioaPivh.css                            753.57 kB │ gzip:  96.80 kB
.cache/assets/CounterButton-DCYlvpZh.js                       3.34 kB │ gzip:   1.15 kB │ map:     2.92 kB
.cache/assets/index-DSp2zPdR.js                             728.38 kB │ gzip: 179.25 kB │ map: 1,334.52 kB
  15 passed (23.8s)

To open last HTML report run:

  npx playwright show-report
Все тесты пройдены успешно. Тестов было 15 (а не 5), потому что каждый тест проверяется в 3 браузерах. Мы можем запустить наши тесты только в одном браузере. Например:
npm run test-ct -- --project=chromium

> vuetify-playwright-ct@0.0.0 test-ct
> playwright test -c playwright-ct.config.ts --project=chromium


Running 5 tests using 4 workers
  5 passed (3.9s)

To open last HTML report run:

  npx playwright show-report
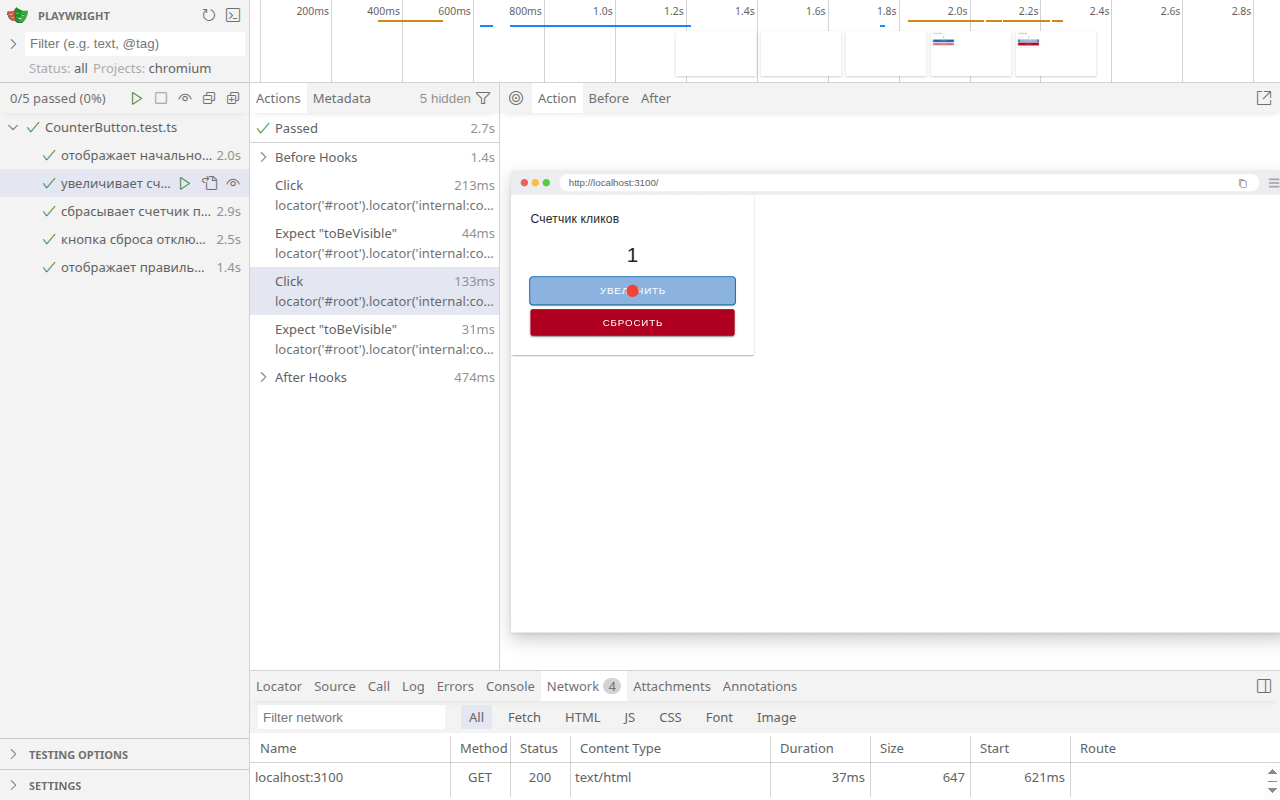
При желании можно запустить и режим ui — npm run test-ct -- --project=chromium --ui и пройти по шагам любой тест. На Рисунке 1 приведен снимок экрана для этого режима.
Тесты более сложного компонента
Первый компонент был очень простой. Теперь добавим новый, с моделью, свойствами и событиями. Это будет модальное окно «Ввод кода подтвеждения» с полем ввода. При нажатии кнопки «Отмена» в окне оно просто закрывается и отпаравляется событие cancel, а при нажатии «ОК» происходит событие approve. В событие approve передается введенный код. Также нужно иметь возможность свойством менять заголовок диалога.
Код компонента:
<template>
  <v-dialog
    v-model="model"
    max-width="520"
    data-testid="confirmation-code-dialog"
  >
    <v-card>
      <v-card-title class="text-h6" data-testid="title">
        {{ props.title }}
      </v-card-title>

      <v-card-text>
        <v-text-field
          v-model="code"
          label="Код подтверждения"
          autocomplete="one-time-code"
          inputmode="numeric"
          data-testid="code-input"
        />
      </v-card-text>

      <v-card-actions>
        <v-spacer />
        <v-btn
          variant="text"
          data-testid="cancel"
          @click="onCancel"
        >
          Отмена
        </v-btn>
        <v-btn
          color="primary"
          variant="text"
          data-testid="approve"
          @click="onApprove"
        >
          ОК
        </v-btn>
      </v-card-actions>
    </v-card>
  </v-dialog>
</template>

<script setup lang="ts">
import { ref, watch } from 'vue'

interface Props {
  title?: string
}

const props = withDefaults(defineProps<Props>(), {
  title: 'Ввод кода подтвеждения',
})

const model = defineModel<boolean>({ default: false })

const emit = defineEmits<{
  cancel: []
  approve: [code: string]
}>()

const code = ref('')

watch(model, (isOpen) => {
  // При каждом открытии начинаем с пустого значения.
  if (isOpen) code.value = ''
})

function onCancel() {
  model.value = false
  emit('cancel')
}

function onApprove() {
  model.value = false
  emit('approve', code.value)
}
</script>
Файл с тестами компонента:
import { test, expect } from '@playwright/experimental-ct-vue'
import ConfirmationCodeDialog from './ConfirmationCodeDialog.vue'

const selectors = {
  title: 'title',
  input: 'code-input',
  cancel: 'cancel',
  approve: 'approve',
} as const

test('закрыт по умолчанию (modelValue=false)', async ({ mount, page }) => {
  await mount(ConfirmationCodeDialog)

  // В диалогах Vuetify контент может оставаться в DOM, поэтому проверяем "hidden".
  await expect(page.getByTestId(selectors.title)).toBeHidden()
})

test('открывается по модели (modelValue=true) и показывает элементы', async ({ mount, page }) => {
  await mount(ConfirmationCodeDialog, {
    props: { modelValue: true },
  })

  await expect(page.getByTestId(selectors.title)).toBeVisible()
  await expect(page.getByTestId(selectors.input)).toBeVisible()
  await expect(page.getByTestId(selectors.cancel)).toBeVisible()
  await expect(page.getByTestId(selectors.approve)).toBeVisible()
})

test('заголовок: по умолчанию и через prop title', async ({ mount, page }) => {
  const component = await mount(ConfirmationCodeDialog, {
    props: { modelValue: true },
  })
  await expect(page.getByTestId(selectors.title)).toHaveText('Ввод кода подтвеждения')

  await component.update({ props: { title: 'Введите код из СМС' } })
  await expect(page.getByTestId(selectors.title)).toHaveText('Введите код из СМС')
})

test('Отмена: закрывает диалог, эмитит cancel, не эмитит approve', async ({ mount, page }) => {
  let cancelCalls = 0
  let approveCalls: string[] = []
  const modelUpdates: boolean[] = []

  await mount(ConfirmationCodeDialog, {
    props: { modelValue: true },
    on: {
      cancel: () => cancelCalls++,
      approve: (code: string) => approveCalls.push(code),
      'update:modelValue': (v: boolean) => modelUpdates.push(v),
    },
  })

  await page.getByTestId(selectors.cancel).click()

  expect(cancelCalls).toBe(1)
  expect(approveCalls).toEqual([])
  expect(modelUpdates).toContain(false)
  await expect(page.getByTestId(selectors.title)).toBeHidden()
})

test('ОК: эмитит approve с введенным кодом и закрывает диалог', async ({ mount, page }) => {
  const approveCodes: string[] = []
  let cancelCalls = 0
  const modelUpdates: boolean[] = []

  await mount(ConfirmationCodeDialog, {
    props: { modelValue: true },
    on: {
      cancel: () => cancelCalls++,
      approve: (code: string) => approveCodes.push(code),
      'update:modelValue': (v: boolean) => modelUpdates.push(v),
    },
  })

  const input = page.getByTestId(selectors.input).locator('input')
  await input.fill('1234')

  await page.getByTestId(selectors.approve).click()

  expect(cancelCalls).toBe(0)
  expect(approveCodes).toEqual(['1234'])
  expect(modelUpdates).toContain(false)
  await expect(page.getByTestId(selectors.title)).toBeHidden()
})

test('при повторном открытии поле ввода очищается', async ({ mount, page }) => {
  const modelUpdates: boolean[] = []
  const component = await mount(ConfirmationCodeDialog, {
    props: { modelValue: true },
    on: {
      'update:modelValue': (v: boolean) => modelUpdates.push(v),
    },
  })

  const input = page.getByTestId(selectors.input).locator('input')
  await input.fill('9999')
  await expect(input).toHaveValue('9999')

  // Закрываем через отмену.
  await page.getByTestId(selectors.cancel).click()
  await expect(page.getByTestId(selectors.title)).toBeHidden()

  // Синхронизируем "родителя": применяем modelValue=false, который компонент запросил.
  expect(modelUpdates).toContain(false)
  await component.update({ props: { modelValue: false } })

  // Открываем снова через обновление props.
  await component.update({ props: { modelValue: true } })
  await expect(page.getByTestId(selectors.title)).toBeVisible()

  const inputAfterReopen = page.getByTestId(selectors.input).locator('input')
  await expect(inputAfterReopen).toHaveValue('')
})
Запуск тестов:
npm run test-ct -- --project=chromium

> vuetify-playwright-ct@0.0.0 test-ct
> playwright test -c playwright-ct.config.ts --project=chromium


Running 11 tests using 4 workers

vite v6.4.1 building for production...
✓ 559 modules transformed.
.cache/index.html                                             0.40 kB │ gzip:   0.27 kB
.cache/assets/materialdesignicons-webfont-Dp5v-WZN.woff2    403.22 kB
.cache/assets/materialdesignicons-webfont-PXm3-2wK.woff     587.98 kB
.cache/assets/materialdesignicons-webfont-B7mPwVP_.ttf    1,307.66 kB
.cache/assets/materialdesignicons-webfont-CSr8KVlo.eot    1,307.88 kB
.cache/assets/index-Cg7M3Q1a.css                          1,055.24 kB │ gzip: 135.67 kB
.cache/assets/_plugin-vue_export-helper-pcqpp-6-.js           0.25 kB │ gzip:   0.20 kB │ map:     0.13 kB
.cache/assets/CounterButton-D9Uu-jOr.js                       3.26 kB │ gzip:   1.11 kB │ map:     2.90 kB
.cache/assets/ConfirmationCodeDialog-DQ49Qqrn.js              4.85 kB │ gzip:   1.44 kB │ map:     4.15 kB
.cache/assets/index-BDdZdE3K.js                           1,706.40 kB │ gzip: 378.62 kB │ map: 3,617.81 kB
  11 passed (6.2s)

To open last HTML report run:

  npx playwright show-report
Итоги
В результате мы получили компонентные тесты для проекта, использующего Vuetify. Главное здесь — передать верный объект с настройками для createVuetify, использовать в нем ссылку на компоненты и директивы Vuetify, а также вызвать hook beforeMount.
Мы можем монтировать компонент в тесте, передавать ему свойства, значения модели и обработчики событий.
Важно помнить, что в Playwright Component Testing свойства (props) проходят через сериализацию/десериализацию, поэтому объекты, внутри которых есть функции, передавать через props нельзя (как и сами функции в props): они не сериализуются.
Слушать события компонента через опцию on у mount() можно. Вот здесь функции разрешены, потому что Playwright проксирует их как обработчики событий, а не сериализует как данные.
Если вы желаете поработать с кодом проекта и запустить его тесты самостоятельно, то он доступен по ссылке.